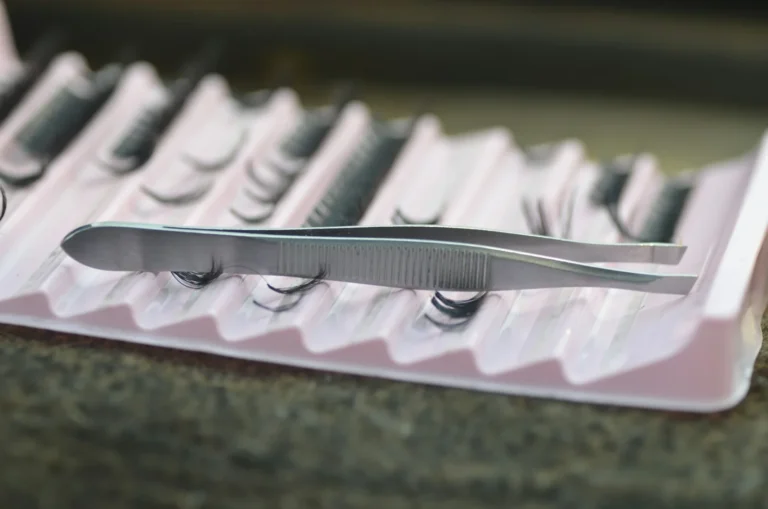


A sample can look right in the first photograph and still leave important questions open. The color may not have been approved, the tray may be a temporary one, or the sample may have been handled before anyone recorded its original condition.
Before starting, separate four decisions: whether you like the design, whether the sample matches the specification, whether the retail pack is correct and whether the product’s supporting documentation is adequate. They need different checks.
Keep an untouched reference
Label the received sample with its code, date, supplier reference and specification revision. Photograph the pack before opening it. If several samples are supplied, reserve one as an untouched comparison where practical and identify which units will be used for handling checks.
Use a clean, consistent work surface and enough light to see the base and fiber arrangement. Keep the comparison background and camera distance stable. A reference photograph taken in different conditions can make a shade or density difference difficult to judge.
Check the retail presentation first
Count what is actually in the pack and compare it with the specified retail unit. Check length labels, row order, style codes and the relationship between the tray and outer packaging. If the pack is a kit, verify every listed component.
Look for visible debris, loose material, damaged trays, crushed areas and printing or packing errors. Record the location rather than writing “packaging bad.” A photograph of the affected row or panel makes the issue easier to discuss and check again.
Compare the top view and the side profile
Use the approved reference and the written specification together. The top view helps show spacing, the length pattern and the placement of longer fibers. The side view helps show the agreed curl profile and whether the product sits consistently on the holder.
Check symmetry only where symmetry is part of the design. A deliberately tapered strip should not be judged by the same visual rule as a uniform cluster assortment. Record shade, finish and base differences separately; one general “appearance” tick can hide several unresolved decisions.
Measure dimensions using the method agreed in the specification sheet. If there is no agreed method or tolerance, flag that gap before using a measurement as the final acceptance rule.
Agree the handling check before carrying it out
Use the removal and preparation method intended for the product, with the appropriate clean tool. Note where the product is held and how it is released from the tray. Check its condition afterward against the agreed requirement.
Do not turn a normal handling check into an improvised strength test. Repeated pulling, arbitrary loads or a different removal technique may answer a different question from the one the product was designed for. If a functional test is needed, agree the protocol, sample quantity and decision rule first.
Write defects as observations
A useful inspection record identifies what happened, where it happened and what evidence supports it. Keep a requested design change separate from a failure to match the approved version.
| Vague note | More useful record |
|---|---|
| “Too full” | Identify the sample and row, photograph the density difference against the approved reference, and state whether a design change is requested. |
| “Wrong lengths” | Record the affected labels, measurement method and results against the agreed specification. |
| “Hard to remove” | Record the tool, holding point and removal method, with photographs of the product before and after the check. |
| “Box not good” | Identify the panel, fit problem, damage or artwork discrepancy and the approved packaging revision. |
Use that record to agree on defect definitions for the order. If acceptance sampling is part of the inspection plan, select the applicable plan with the inspection team. ISO’s overview of acceptance sampling by attributes describes a family of sampling systems; it is not a universal lash-product pass mark.
Do not make a visual approval carry every claim
Approving a sample establishes a reference for the agreed features. It does not, by itself, establish the condition of every unit in a later batch, the performance of a separately supplied adhesive or compliance in every destination market.
For the United States, FDA treats false lashes, extensions and their adhesives as cosmetics. Safety and labeling review therefore needs its own evidence. Keep the product identity, document version and intended market clear rather than treating an attractive sample as proof of compliance.
Send a qualified, traceable approval
The approval should name the sample, the specification revision and the packaging version. State which features are accepted, which need revision and which checks remain outstanding. Attach the photographs or inspection record used to reach the decision.
Avoid an unqualified “all approved” while the shade, artwork or test documents are still under discussion. A short list of open points protects the meaning of the approval and gives the next sample round a clear task.
The quality control page provides the relevant point of reference for a project discussion. Agree the order-specific inspection and approval requirements before production is released.